Galaxy eSIM Installation Guide
Android eSIM Installation Guide
Please install before departure!
- 1.Please check the installation criteria (whether pre-installation is possible) on each product detail page.
- 2.Products with immediate day deduction should be installed after arriving at your destination.
- 3.Plans can only be added in a network environment. (Check Wi-Fi connection status)
- 4.Before departure, please check that data roaming is OFF and auto data switch is OFF for your main line.
Part 1
Pre-Activate & Install eSIM
Method 1
Activate eSIM
Step 1.
Before activation, please check the instructions and your phone model.
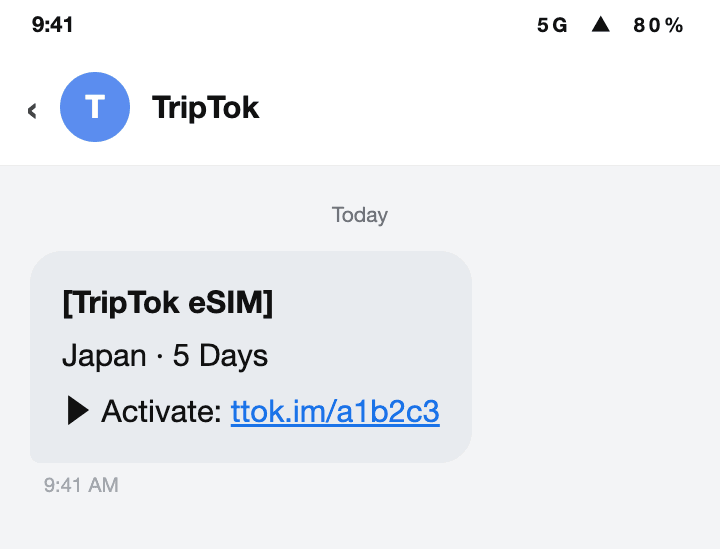
Tap 'Activate eSIM' in the TripTok app or the SMS you received.
tip
For non-members, go to [My Data] > enter [Order Number / Phone Number / Email] to check your purchase history.
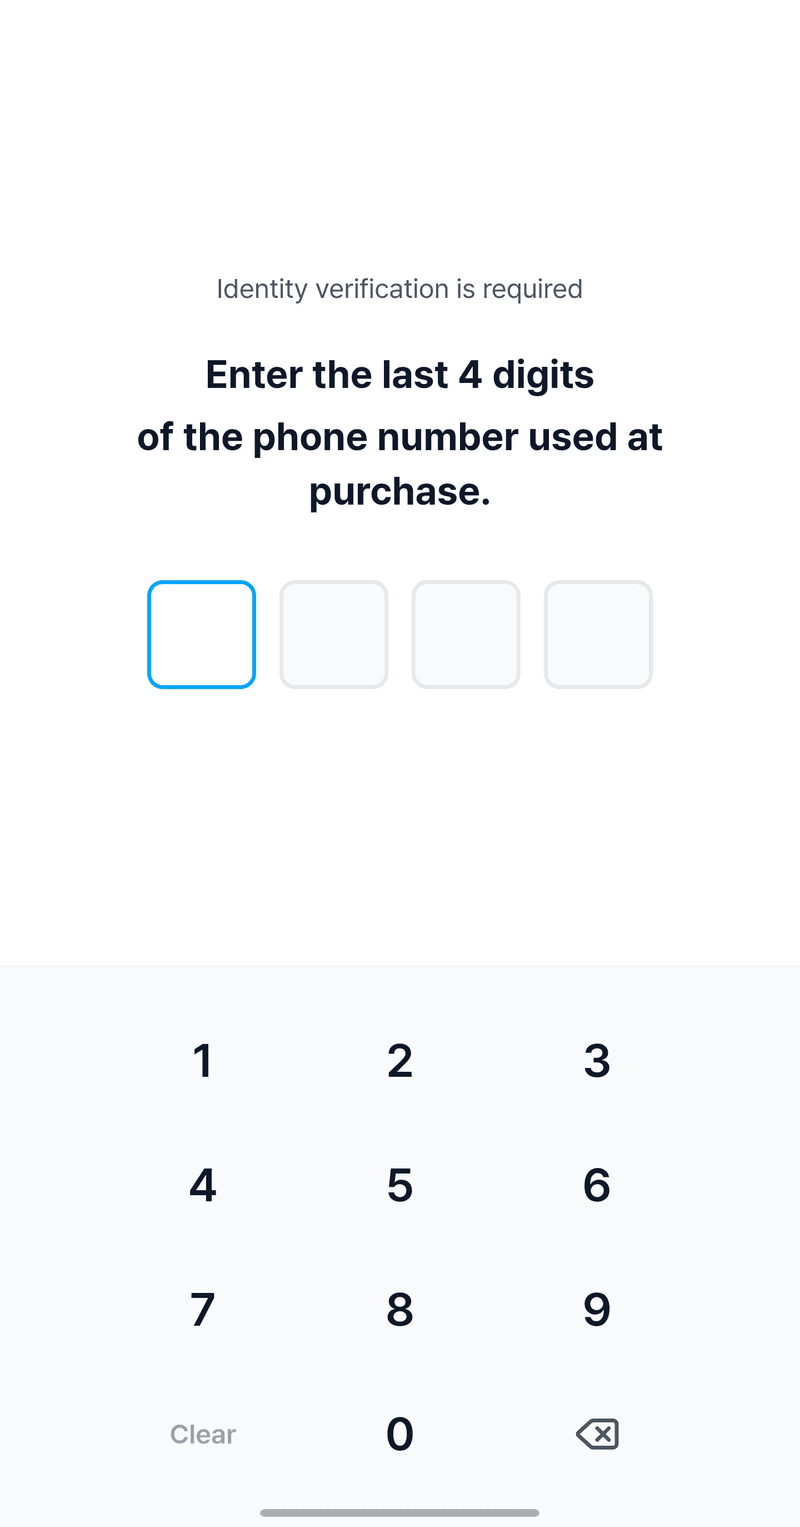
Step 2.
Enter the last 4 digits of the phone number you entered at purchase.
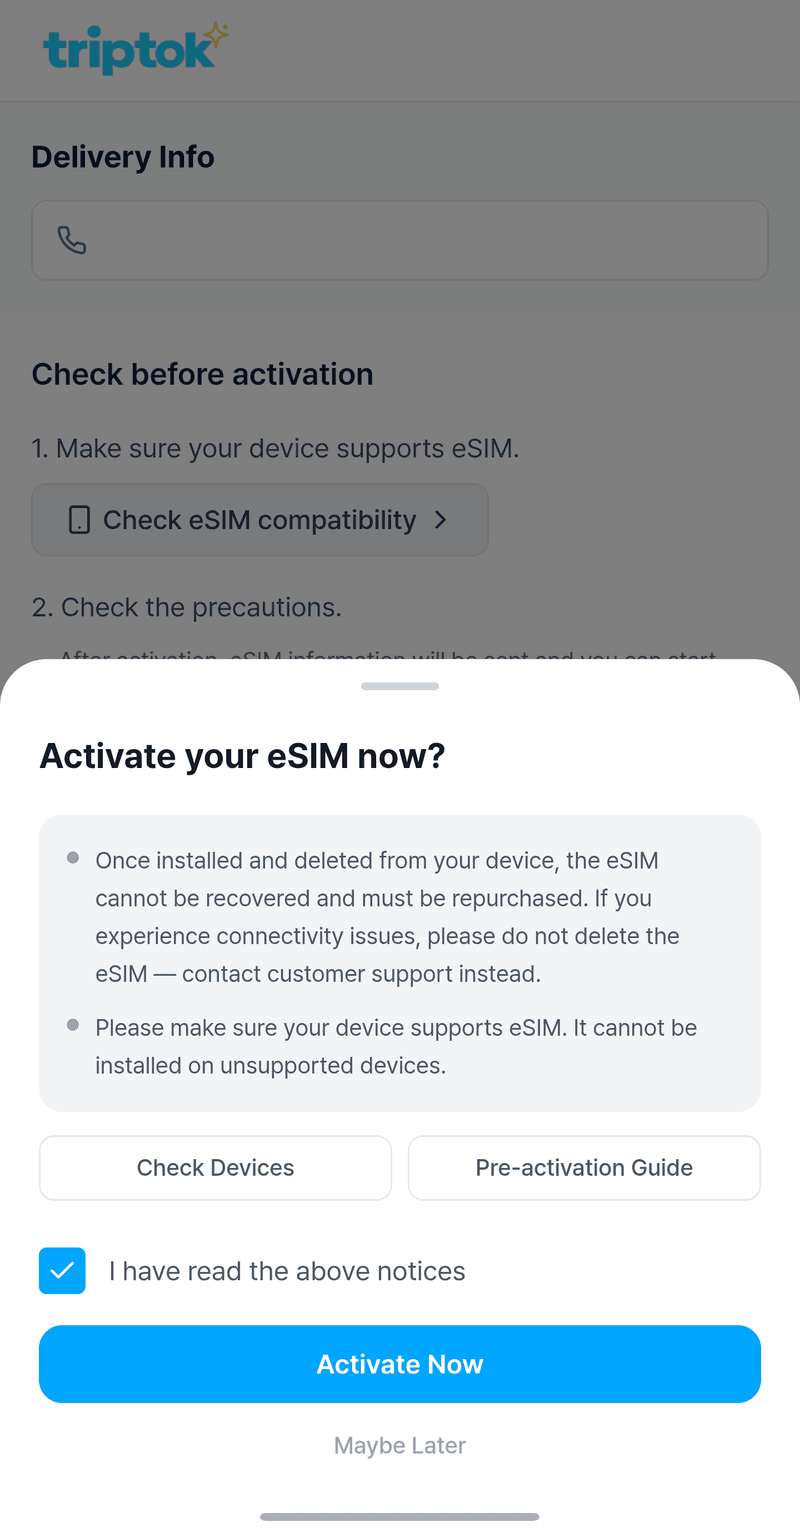
Step 3.
When the screen below appears, check [I have confirmed the above] and select 'Activate Now'.
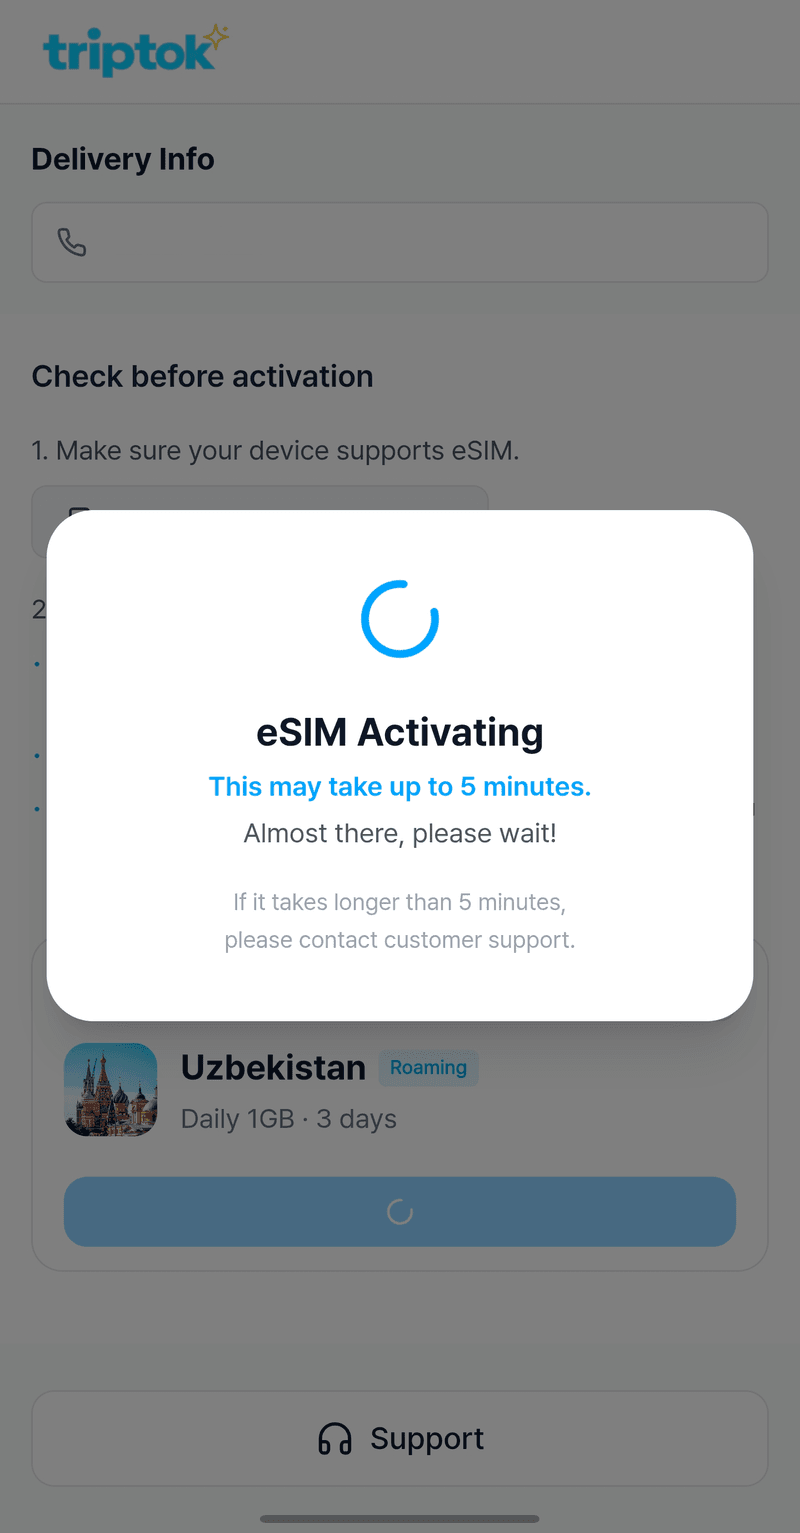
Step 4.
Tap [Activate Now] to begin. It may take up to 5 minutes, so please wait a moment.
Method 2
Auto Install eSIM
Step 1.
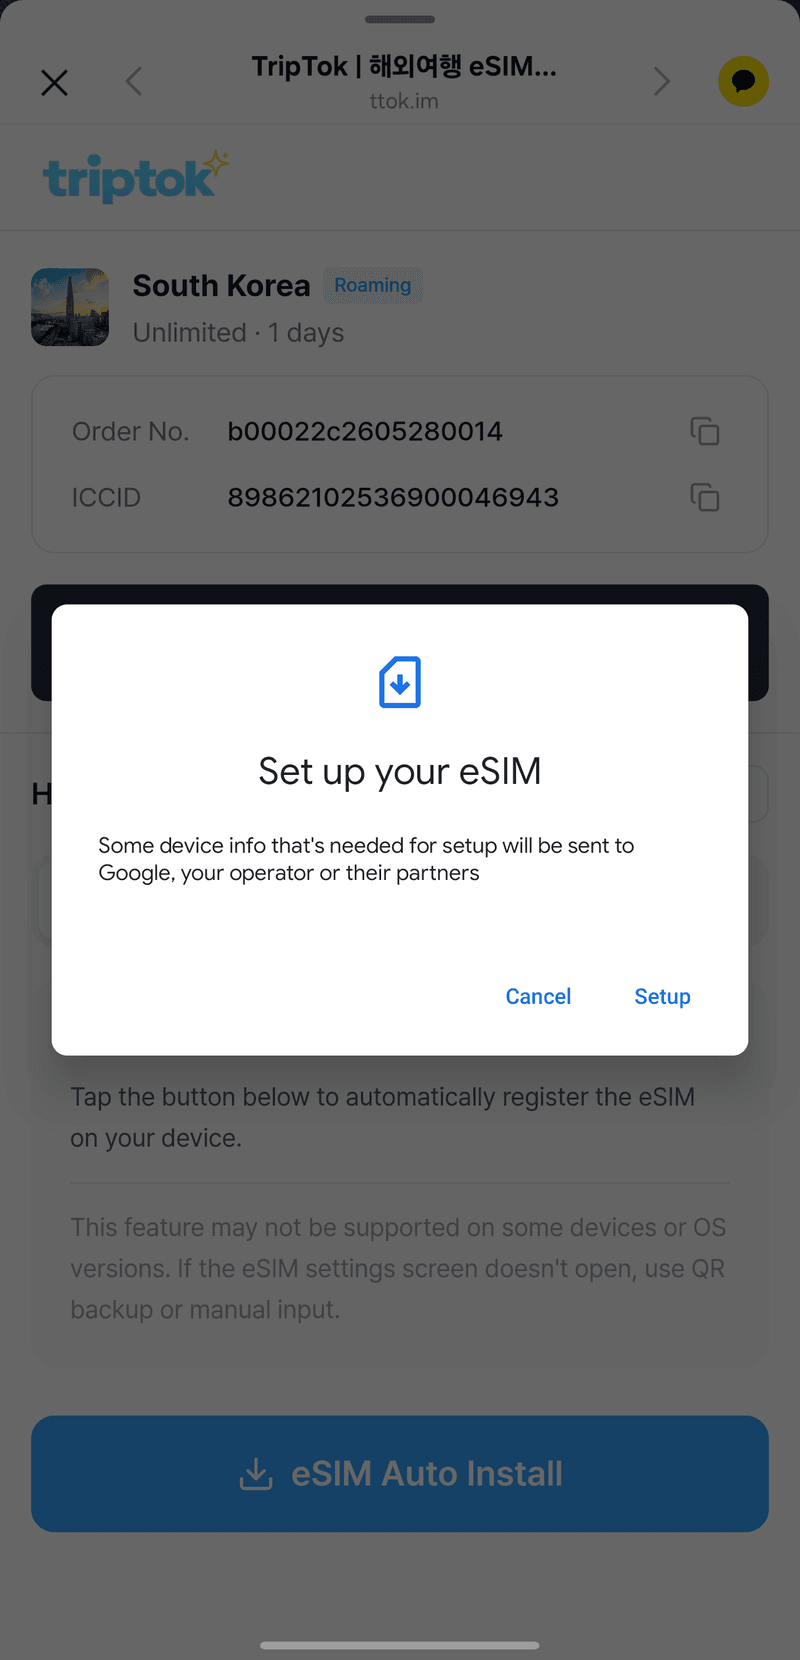
Once eSIM is successfully activated, you will be directed to the installation screen.
① Tap [Auto Install] button, then tap [Auto Install eSIM].
tip
If ① [Auto Install] doesn't work properly, you can also install using ② the backup QR code or ③ the SM-DP+ address shown when selecting Manual Input.

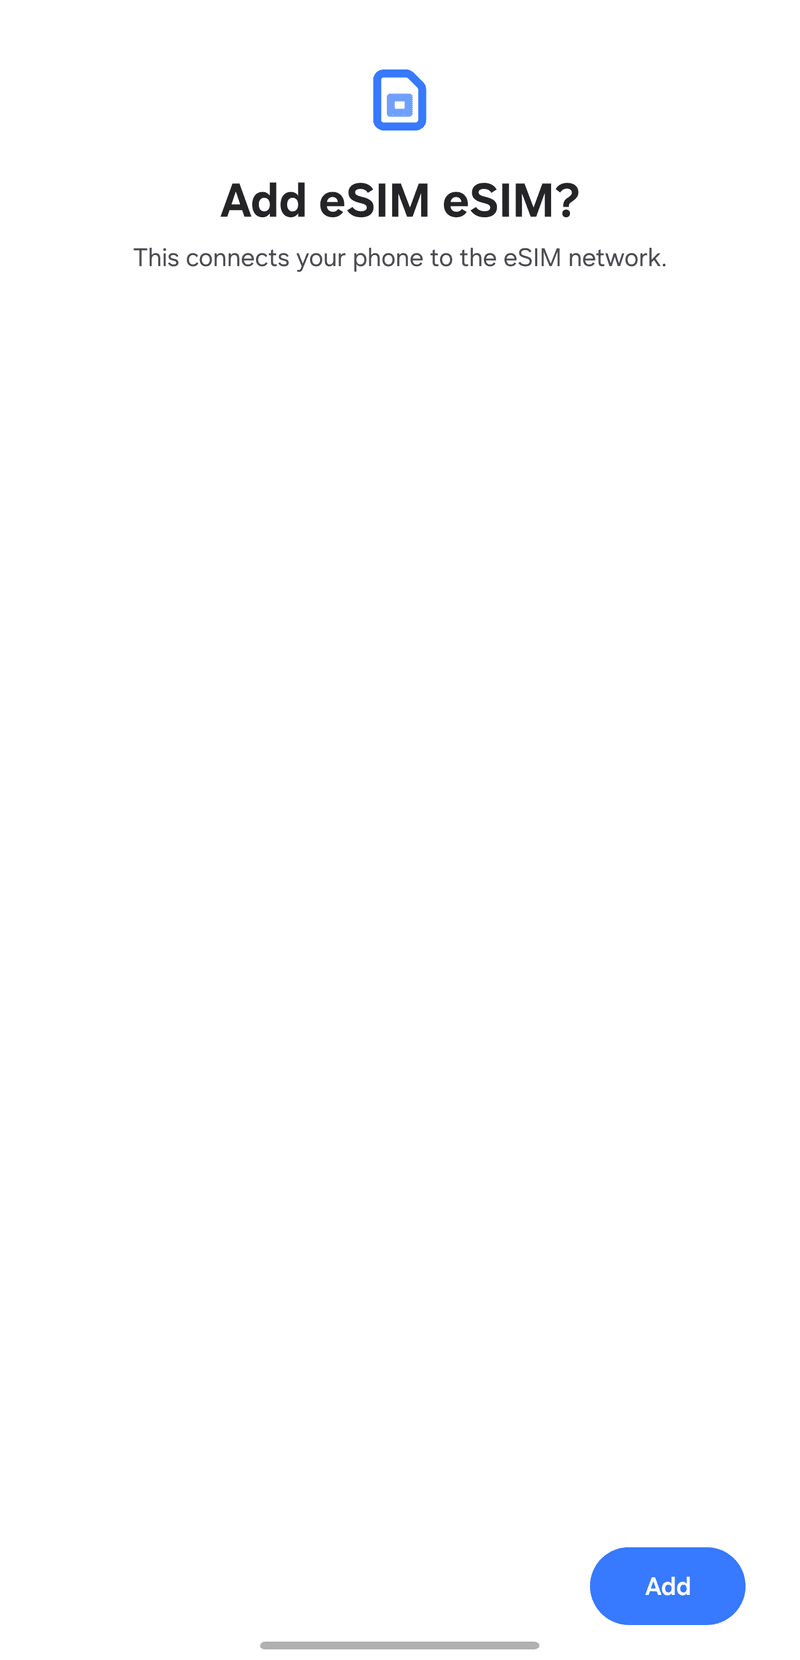
Step 2.
If you see the screen below, tap [Settings] to proceed.
Step 3.
When the screen below appears, tap [Add] button and follow the guide to set up.
Method 3
Install eSIM with a QR Code
Step 1.
In the TripTok app, select the [QR Code] tab to display the QR code for installation.
![In the TripTok app, select the [QR Code] tab to display the QR code for installation.](https://tzp08ua413295.edge.naverncp.com/images/guide/android/pre-install/en/qr_tab.png?w=640)
Step 2.
Open the [Settings] app on your phone and go to [Connections].
![Open the [Settings] app on your phone and go to [Connections].](https://tzp08ua413295.edge.naverncp.com/images/guide/android/pre-install/en/settings.png?w=640)
Step 3.
On the [Connections] screen, select [SIM manager].
![On the [Connections] screen, select [SIM manager].](https://tzp08ua413295.edge.naverncp.com/images/guide/android/pre-install/en/connections.png?w=640)
Step 4.
In [SIM manager], tap [Add eSIM].
![In [SIM manager], tap [Add eSIM].](https://tzp08ua413295.edge.naverncp.com/images/guide/android/pre-install/en/sim_manager.png?w=640)
Step 5.
Select [Scan QR code].
![Select [Scan QR code].](https://tzp08ua413295.edge.naverncp.com/images/guide/android/pre-install/en/add_method_qr.png?w=640)
Step 6.
Scan the QR code shown in the TripTok app to finish installing your eSIM.
tip
It's best to scan the QR code with another device. Scanning on the same device may not work.
Method 4
Install via Manual Input
Step 1.
After activating eSIM, tap [Manual Input] and copy the [SM-DP+ Address + Activation Code].
![After activating eSIM, tap [Manual Input] and copy the [SM-DP+ Address + Activation Code].](https://tzp08ua413295.edge.naverncp.com/images/guide/android/pre-install/en/manual_copy.png?w=640)
Step 2.
Open the [Settings] app on your phone and go to [Connections].
Step 3.
On the [Connections] screen, select [SIM manager].
Step 4.
In [SIM manager], tap [Add eSIM].
Step 5.
Select [Scan QR code].
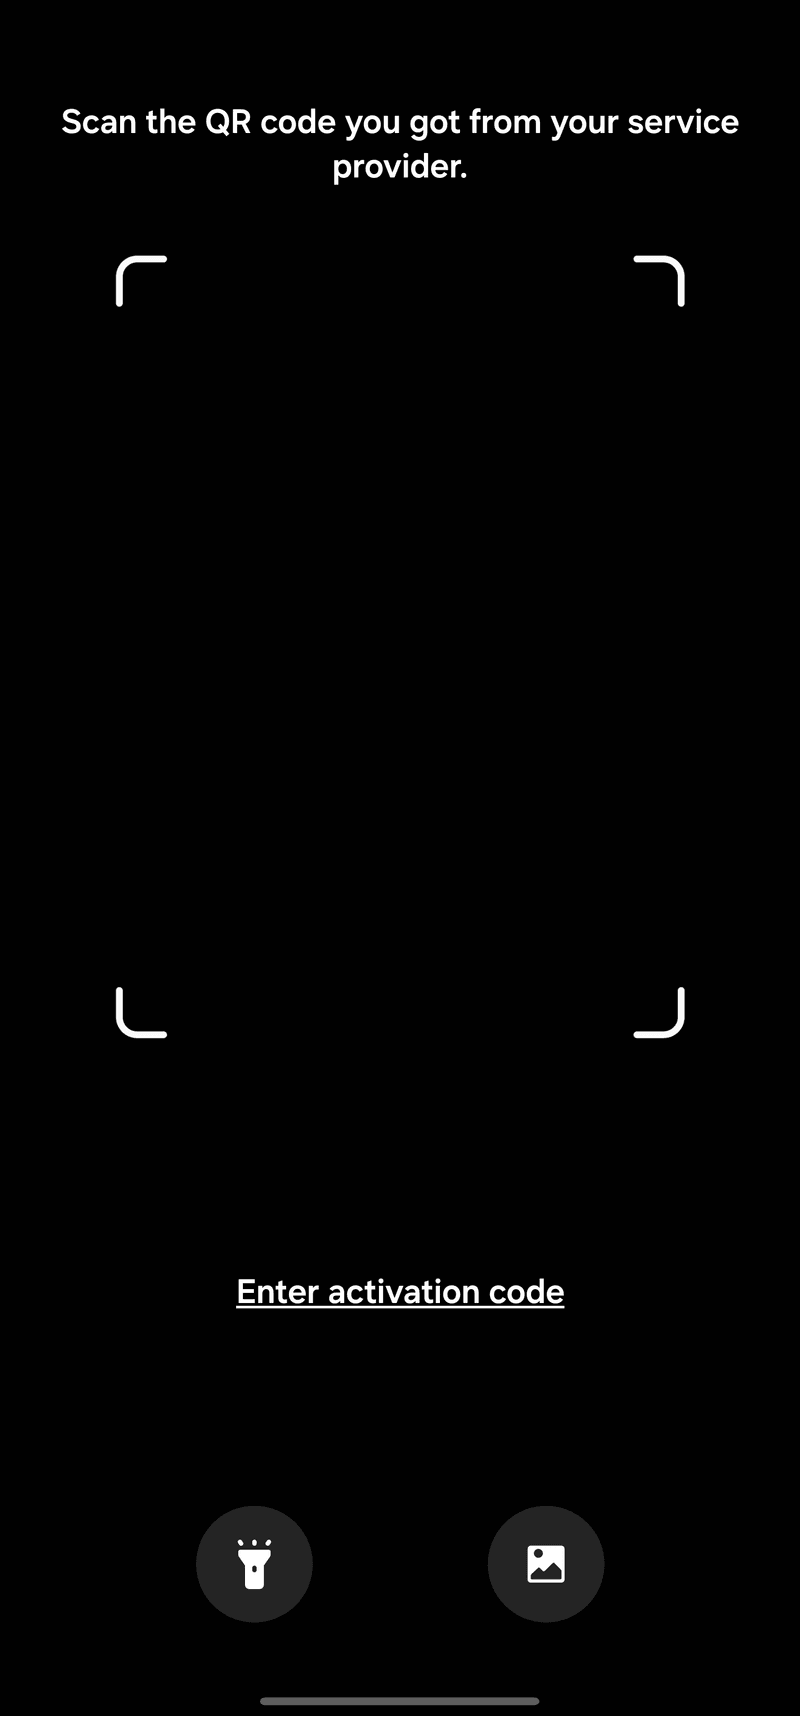
Step 6.
When the camera opens, tap [Enter activation code] at the bottom.
Step 7.
When the screen below appears, paste the copied [SM-DP+ Address + Activation Code].
tip
Please check that no unnecessary spaces, line breaks, or symbols are included!
![When the screen below appears, paste the copied [SM-DP+ Address + Activation Code].](https://tzp08ua413295.edge.naverncp.com/images/guide/android/pre-install/en/enter_code.png?w=640)
Part 2
Before Your Trip! Set Up eSIM Line at Home
Method 1
Set eSIM Name (Optional)
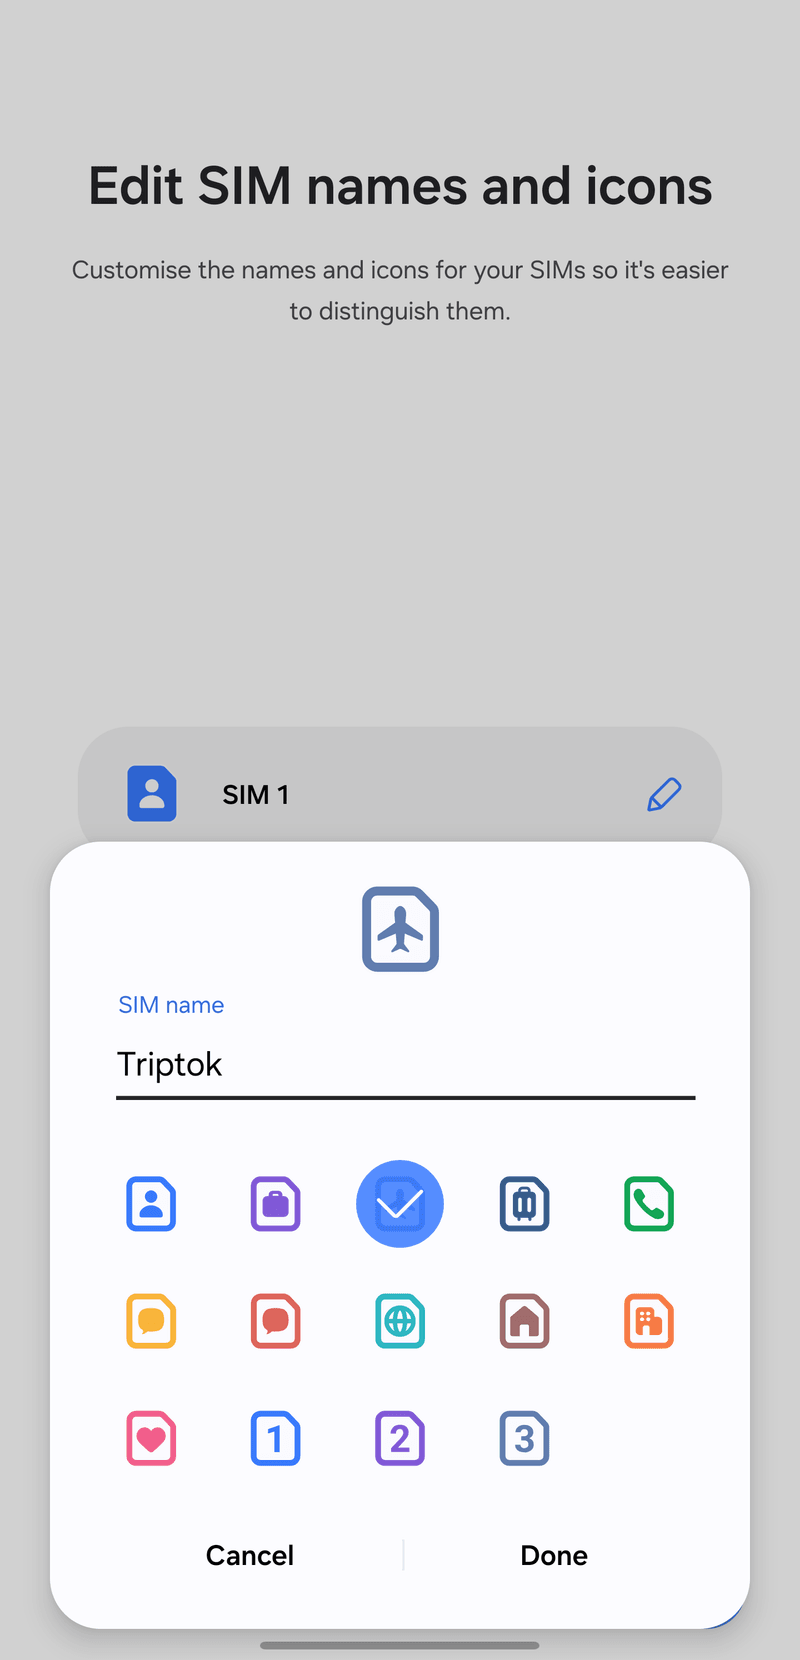
Step 1.
Once activation is complete, we recommend setting a name for your TripTok eSIM to avoid confusion with other lines.
tip
Even if you complete QR registration and activation at home, the plan won't start until you connect to the local network, so don't worry.
Method 2
eSIM Line Settings
Step 1.
Under [Preferred SIM for calls], select [SIM 1] (your existing main SIM).
![Under [Preferred SIM for calls], select [SIM 1] (your existing main SIM).](https://tzp08ua413295.edge.naverncp.com/images/guide/android/pre-install/en/line_call.png?w=640)
Step 2.
Under [Preferred SIM for messages], also select [SIM 1].
![Under [Preferred SIM for messages], also select [SIM 1].](https://tzp08ua413295.edge.naverncp.com/images/guide/android/pre-install/en/line_message.png?w=640)
Step 3.
Under [Preferred SIM for mobile data], select [SIM 1] and turn off [Data switching].
tip
Data switching is a feature that switches to another SIM when data is unavailable.
![Under [Preferred SIM for mobile data], select [SIM 1] and turn off [Data switching].](https://tzp08ua413295.edge.naverncp.com/images/guide/android/pre-install/en/line_data.png?w=640)
Step 4.
While in your home country, turn off the TripTok eSIM in [SIM manager]. Turn it back on after you arrive.
![While in your home country, turn off the TripTok eSIM in [SIM manager]. Turn it back on after you arrive.](https://tzp08ua413295.edge.naverncp.com/images/guide/android/pre-install/en/sim_off.png?w=640)
eSIM installation is complete!
Have a safe and enjoyable trip